Creating a Filepond component using Blade, Livewire, & Alpine.js. Then validating & storing with Spatie Media Library
Let's create a Blade component that uses the Filepond library with Alpine.js, sends it to the server with Livewire, and saves it with Spatie Media Library.
In this article we are going to cover a few key topics:
- Creating a Livewire component and supporting view.
- Creating a Blade component and learning how to utilize attributes.
- Using the @once directive to load third party libraries via CDN.
- Using Alpine.js to interact with Filepond.
- Using Livewire's @this to upload the file via XHR to the backend Livewire component.
- Validating, displaying errors, and saving the file(s) from the component to the model using Spatie Media Library.
- Using Filepond plugins for displaying image previews, type validation, file size validation, etc.
I will use the code I built for the backend of this custom blogging software as a base to more realistically portray using these items together in a real world scenario.
I should note that most of this is covered in the Livewire screencast section 'File Uploads', so go check that out and support Livewire if you can.
Please reference the "Resources" section in the right column for links to all items used in this article.

Here is an example of what we will be building as seen from my backend of this blog:
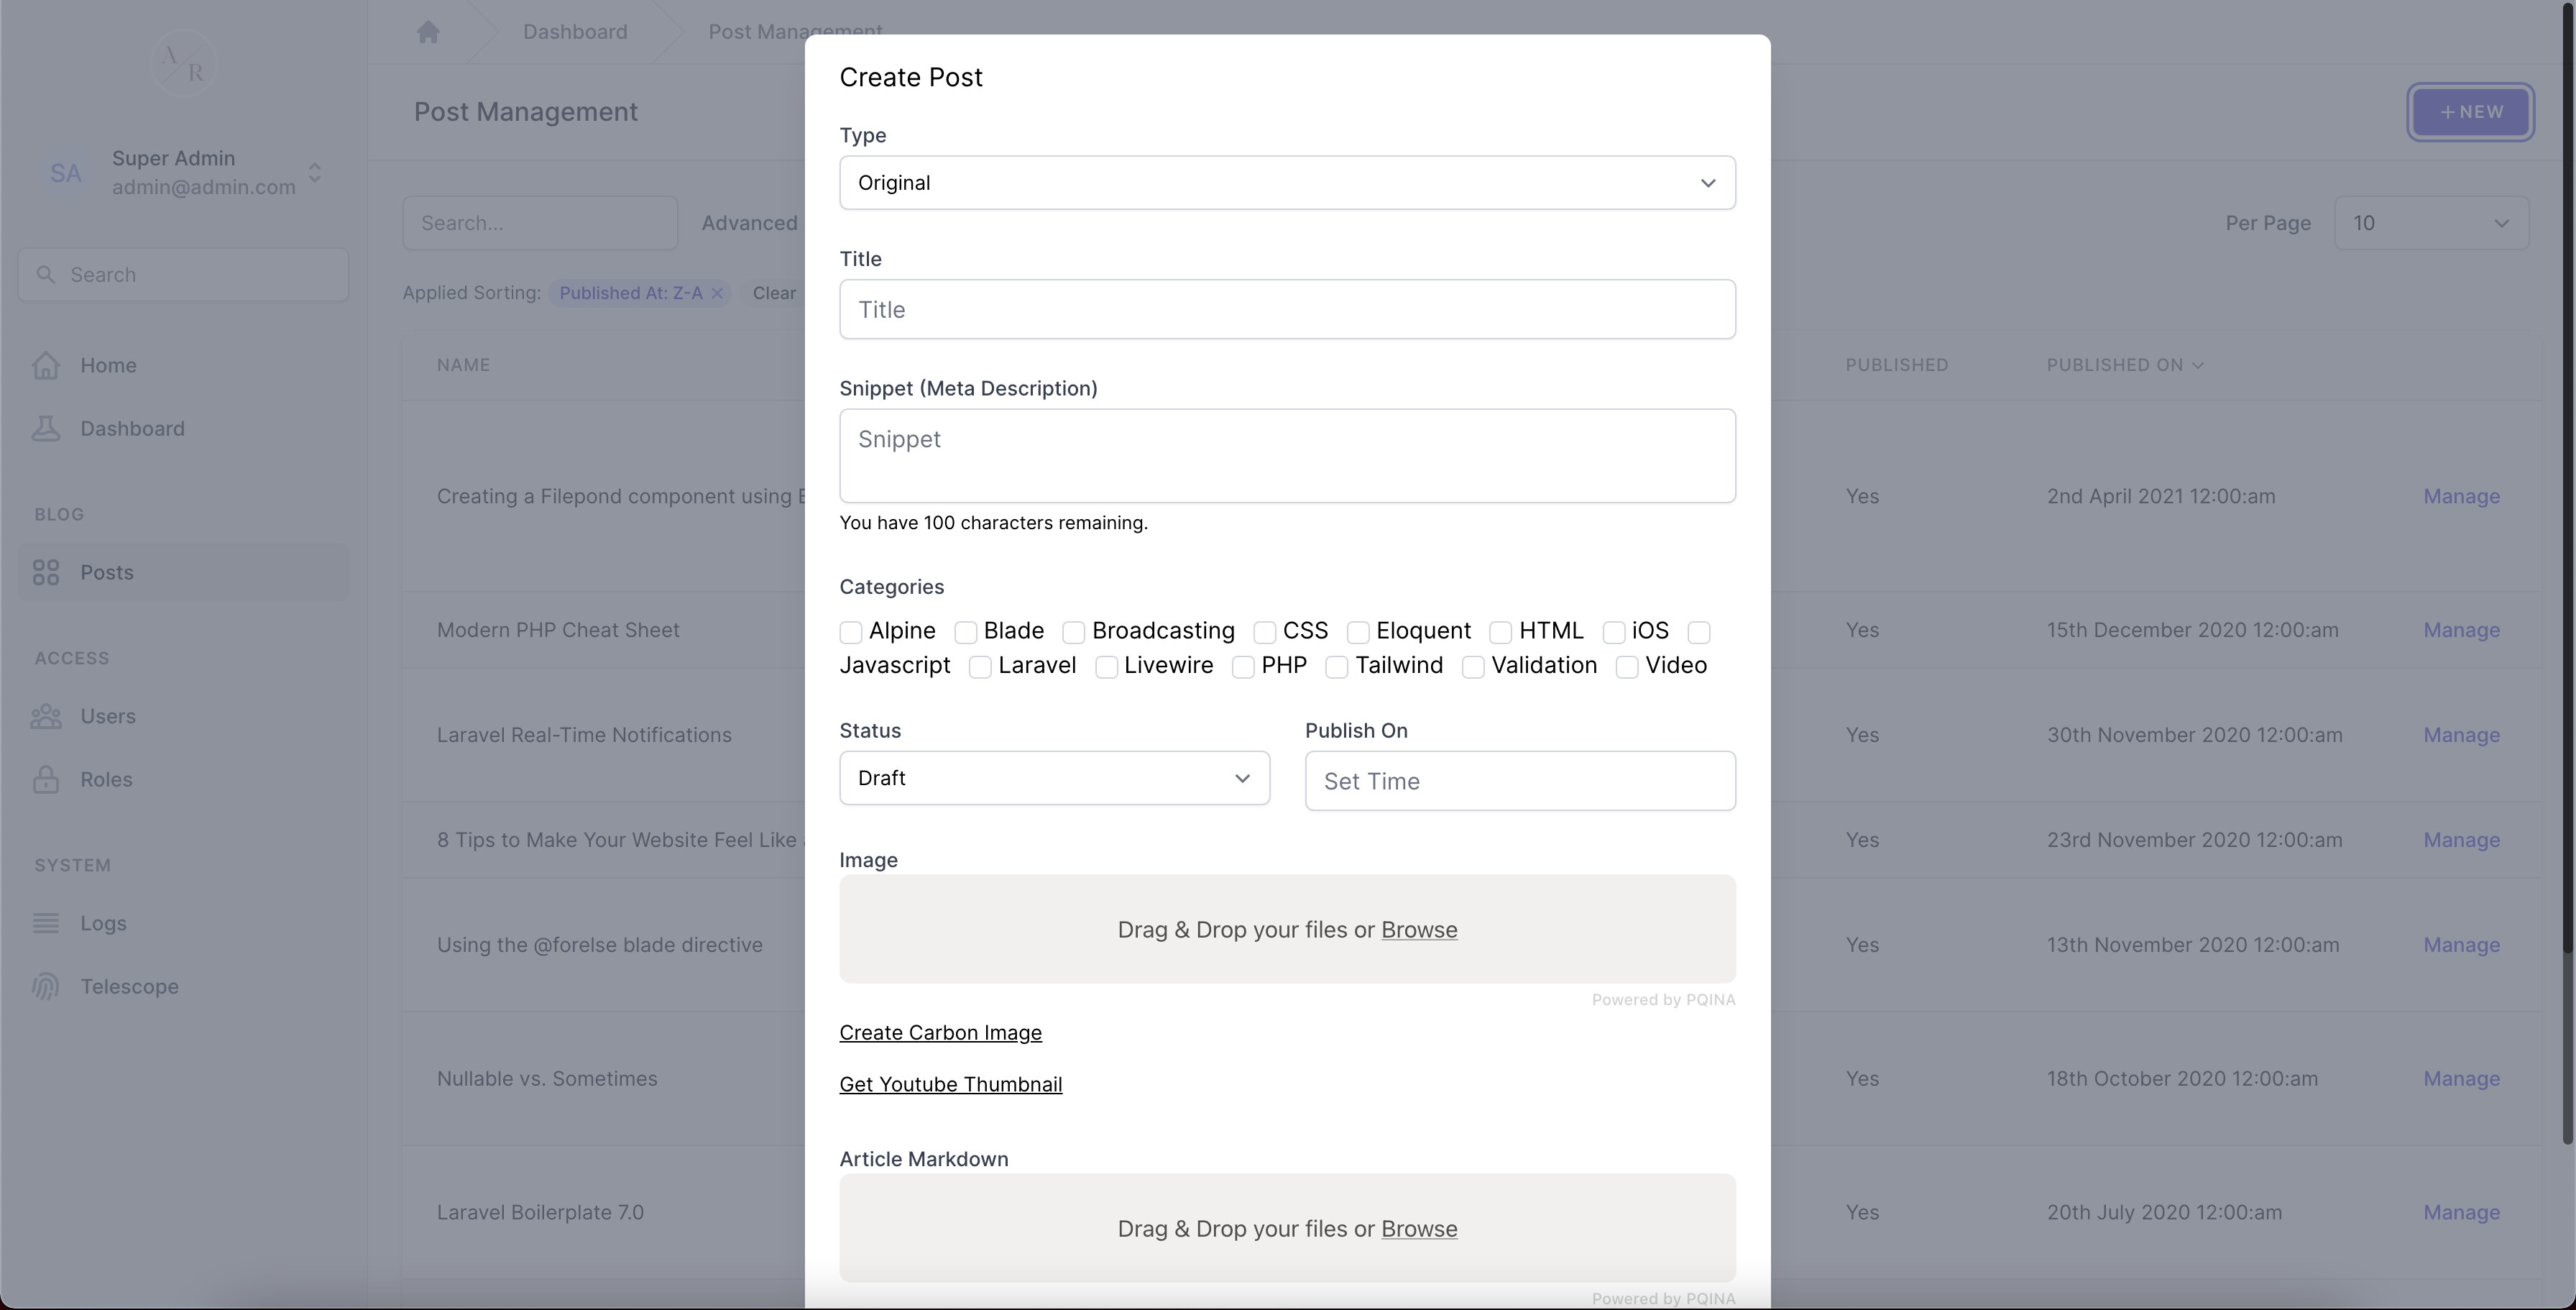
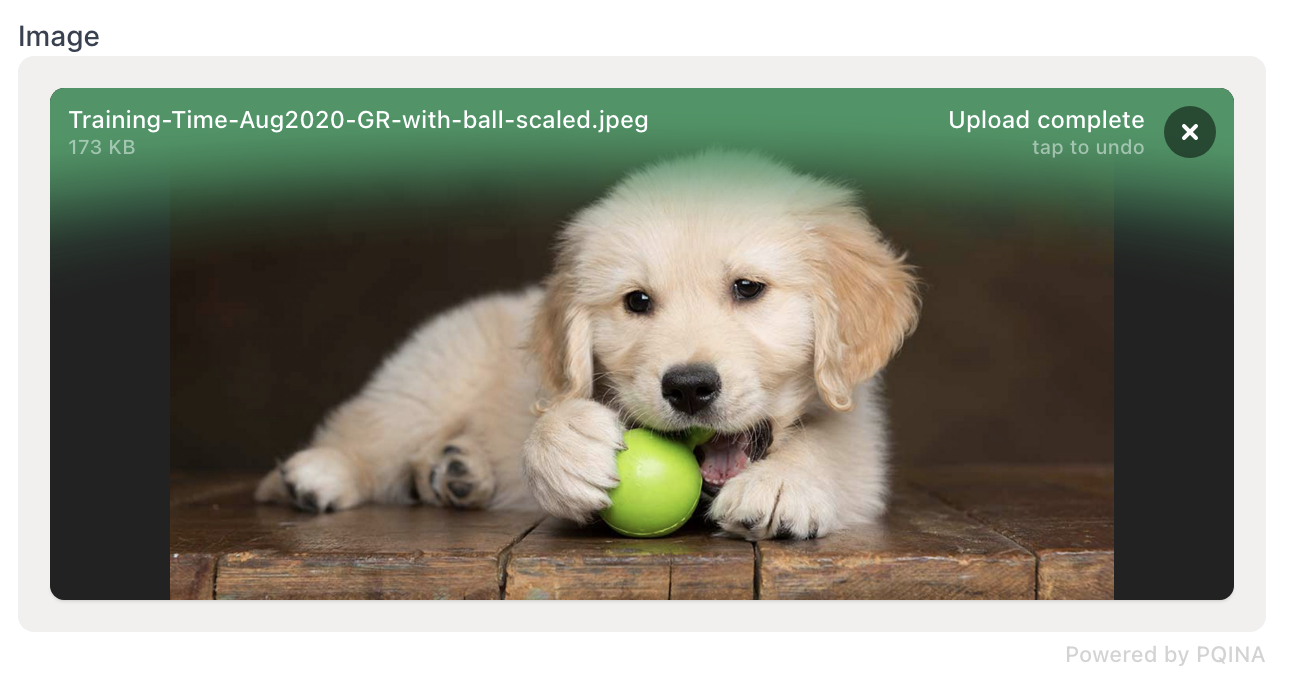
Here's an example of what the Filepond component looks like when it has uploaded a file and is awaiting form submission:
Because this article has a lot of information, I'm going to assume you have at least a moderate knowledge of Laravel, Livewire, and Alpine. If not, use it as a learning tool and every time you reach a point of confusion, Google that topic.
This article assumes you have a Laravel project with Livewire & Alpine installed. If not, then do that and come back (An easy solution is to set up a new Laravel project and install Jetstream as it is a good base TALL stack).
To start we are going to make a base Livewire component, we are going to leave out the fancy stuff in the image above such as the modal and surrounding fields and pretend this is just a form that uploads an image for now.
1. Create Livewire Component
Here is our base Livewire Component:
1<?php 2 3namespace App\Http\Livewire\Forms; 4 5use Livewire\Component; 6use Livewire\WithFileUploads; 7 8class UpdateProfile extends Component 9{10 use WithFileUploads;11 12 public function render()13 {14 return view('livewire.forms.update-profile');15 }16}1<!-- views/livewire/forms/update-profile.blade.php -->2 3<div></div>The only difference between this and a base component generated from the make:livewire command, is that I added the WithFileUploads trait as this is needed for Livewire server component to talk to the Livewire Javascript library to sync the file with the backend.
Now that we have our Livewire component made, we can add it to our view using:
1<livewire:forms.update-profile />Note: Here we are using dot syntax to get the component from its nested folder.
That's all we are going to do with that for now since the majority of our work is handled in the Blade component.
Next, we're going to create an anonymous blade component to include in our Livewire view:
Since this is an anonymous component, we don't need the class portion, any Blade files created in views/components will automatically be registered as a Blade component by Laravel:
1<!-- views/components/forms/filepond.blade.php -->2 3<div></div>Now back to our Livewire view, we can load in our new Blade component:
1<!-- views/livewire/forms/update-profile.blade.php -->2 3<div>4 <form wire:submit.prevent="updateProfile">5 <x-forms.filepond />6 7 <button type="submit">Save</button>8 </form>9</div>Note: We don't need the outer div, since the form can act as the sole element, but I like to add it just as a formality in case I needed to add something after the form later.
I added the form element so we have something to submit. So in the Livewire component we can add the updateProfile method to use later:
1public function updateProfile(): void2{3 // Will get hit when the submit button is clicked4}2. Build the Filepond Blade Component
Back to the Filepond component to flesh out the meat and potatoes of this whole article, and that's getting Alpine.js to upload a file to Livewire using Filepond.
There are a few things we have to do:
- Ignore the Blade component's main element so that Livewire does not mess with the Javascript within.
- Add a file input and make a reference to use in Alpine.
- Include the Filepond CDN using @once.
- Use Alpine to initialize the Filepond component.
- Use the Filepond API to upload the file(s) using the built-in Livewire @this.upload function.
- Use the Filepond API to remove the uploaded file using the built-in Livewire @this.removeUpload function.
1. Tell Livewire to ignore the main component
When working with Javascript components inside Livewire, you tend to have issues when Livewire tries to dom-diff a component who's DOM has been modified by a Javascript plugin.
Livewire has a solution for this, and that is wire:ignore.
This tells Livewire to ignore this subset of HTML when doing its DOM manipulations.
1<!-- views/livewire/forms/update-profile.blade.php -->2 3<div wire:ignore></div>Now our filepond component will be left alone.
2. Adding a reference and a file input
Next we add a regular HTML file input to the component and give it a reference using Alpine (just like in Vue) that we can use to access that element from within the Javascript.
1<!-- views/livewire/forms/update-profile.blade.php -->2 3<div4 wire:ignore5 x-data6>7 <input type="file" x-ref="input" />8</div>Note: We have to add x-data in order for Alpine to initialize this element as an Alpine component. We then have access to x-ref. We can now target the file element in the x-data and x-init functions using $refs.input.
3. Include the Filepond CDN using @once
When using reusable components that have external Javascript dependencies you have a couple options:
- Install using npm and include in your bundle, so it's available where you need it.
- Use a CDN on the pages you need to access it.
We are going to go with option 2, but instead of adding it to the page itself, we are going to add it to the component.
However, that brings up another issue, if we have more than one of the same component on a page the CDN calls will be duplicated.
Laravel provides the @once directive for this reason. It only includes that portion of the template once per rendering cycle.
1<!-- views/livewire/forms/update-profile.blade.php --> 2 3<div 4 wire:ignore 5 x-data 6> 7 <input type="file" x-ref="input" /> 8</div> 9 10@push('styles')11 @once12 <link href="https://unpkg.com/filepond/dist/filepond.css" rel="stylesheet">13 @endonce14@endpush15 16@push('scripts')17 @once18 <script src="https://unpkg.com/filepond/dist/filepond.js"></script>19 @endonce20@endpushUsing Laravel stacks which I have defined in my master layout that this page is inheriting from, I can push these script calls to their respective location in the file where I want them to appear. We now have access to Filepond.
4. Use Alpine to initialize the Filepond component.
Now that we have access to Alpine and Filepond, we can finally use our reference to create an instance of Filepond:
1<!-- views/livewire/forms/update-profile.blade.php --> 2 3<div 4 wire:ignore 5 x-data 6 x-init="() => { 7 const post = FilePond.create($refs.input); 8 }" 9>10 <input type="file" x-ref="input" />11</div>12 13<!-- Stacks Here -->Here we use a callback to the x-init call to run our code after Alpine has made its initial DOM updates.
We then use our reference to target our HTML file input and turn it into a Filepond component.
You should now see a default Filepond component in place of what was the HTML file input:

5. Use the Filepond API to upload the file(s)
Now we are finally going to make our component work, but to do so we need some things:
- We need to add a public property to our Livewire component to house our file(s).
- We need to add wire:model to our Blade component's call so we have access to it using Blade's attributes array inside the Blade component itself.
- We need to use the Filepond process API to tell Livewire how to sync the file to the backend component.
- We need to use Livewire's @this directive inside the Filepond process method (which conveniently have the same API) to tell Livewire to sync the file being uploaded to the property on the Livewire component which matches the wire:model passed through from the main view.
- We need to do the same as above, but this time for un-syncing the file from the backend property and deleting the temporary stored file.
Adding a public property to the Livewire component to house the file:
1<?php 2 3... 4 5class UpdateProfile extends Component 6{ 7 use WithFileUploads; 8 9 public $image;10 11 ...12}Using wire:model to pass it into the Blade component:
1<!-- views/livewire/forms/update-profile.blade.php -->2 3...4<x-forms.filepond5 wire:model="image"6/>7...Using wire:model inside the Blade component and calling the Filepond API to upload the file using Livewire's @this.upload:
1<!-- views/livewire/forms/update-profile.blade.php --> 2 3<div 4 wire:ignore 5 x-data 6 x-init="() => { 7 const post = FilePond.create($refs.input); 8 post.setOptions({ 9 server: {10 process:(fieldName, file, metadata, load, error, progress, abort, transfer, options) => {11 @this.upload('{{ $attributes->whereStartsWith('wire:model')->first() }}', file, load, error, progress)12 },13 }14 });15 }"16>17 <input type="file" x-ref="input" />18</div>19 20<!-- Stacks Here -->As you can see above we are hooking into the Filepond's server call which is triggered when a file is selected or dropped onto the component.
From there we are using Livewire's @this.upload to tell the parent component to sync this file using the wire:model name passed in to that property ($image) from the Blade components $attributes array.
Note: @this is a Blade directive included in Livewire that compiles to Livewire.find([component-id]).
The upload method is also supplied by Livewire, and the API mimics that of Filepond's API.
If you browse and select a file, or drag and drop a file on (we currently only support one, but will support multiple later in the article) then you should see the Filepond component sync the file with the Livewire backend. It will even show you a progress indicator due to the process parameter of Filepond that we passed to Livewire.
5. Removing the temporary file and un-syncinc the $image property when the Filepond remove button is clicked:
Much like the process call above, both Filepond and Livewire have an identical API to remove the sync'd file from the backend component using Filepond's revert callback and Livewire's removeUpload method:
1<!-- views/livewire/forms/update-profile.blade.php --> 2 3<div 4 wire:ignore 5 x-data 6 x-init="() => { 7 const post = FilePond.create($refs.input); 8 post.setOptions({ 9 server: {10 process:(fieldName, file, metadata, load, error, progress, abort, transfer, options) => {11 @this.upload('{{ $attributes->whereStartsWith('wire:model')->first() }}', file, load, error, progress)12 },13 revert: (filename, load) => {14 @this.removeUpload('{{ $attributes->whereStartsWith('wire:model')->first() }}', filename, load)15 },16 }17 });18 }"19>20 <input type="file" x-ref="input" />21</div>22 23<!-- Stacks Here -->This will remove the temporary file that Livewire has stored. This works with both single file uploads and file upload arrays.
That's it! We can now sync and un-sync a temporary file to the Livewire component.
Now lets build the Livewire component functionality to validate and store the file using Spatie Media Library.
3. Save the file(s)
Note: Spatie Media Library is not required at all for this tutorial, but it is by far my favorite way to associate files with models in Laravel.
These are the steps we need to accomplish for this next section:
- Install Spatie Media Library.
- Set up a model to associate a media collection with.
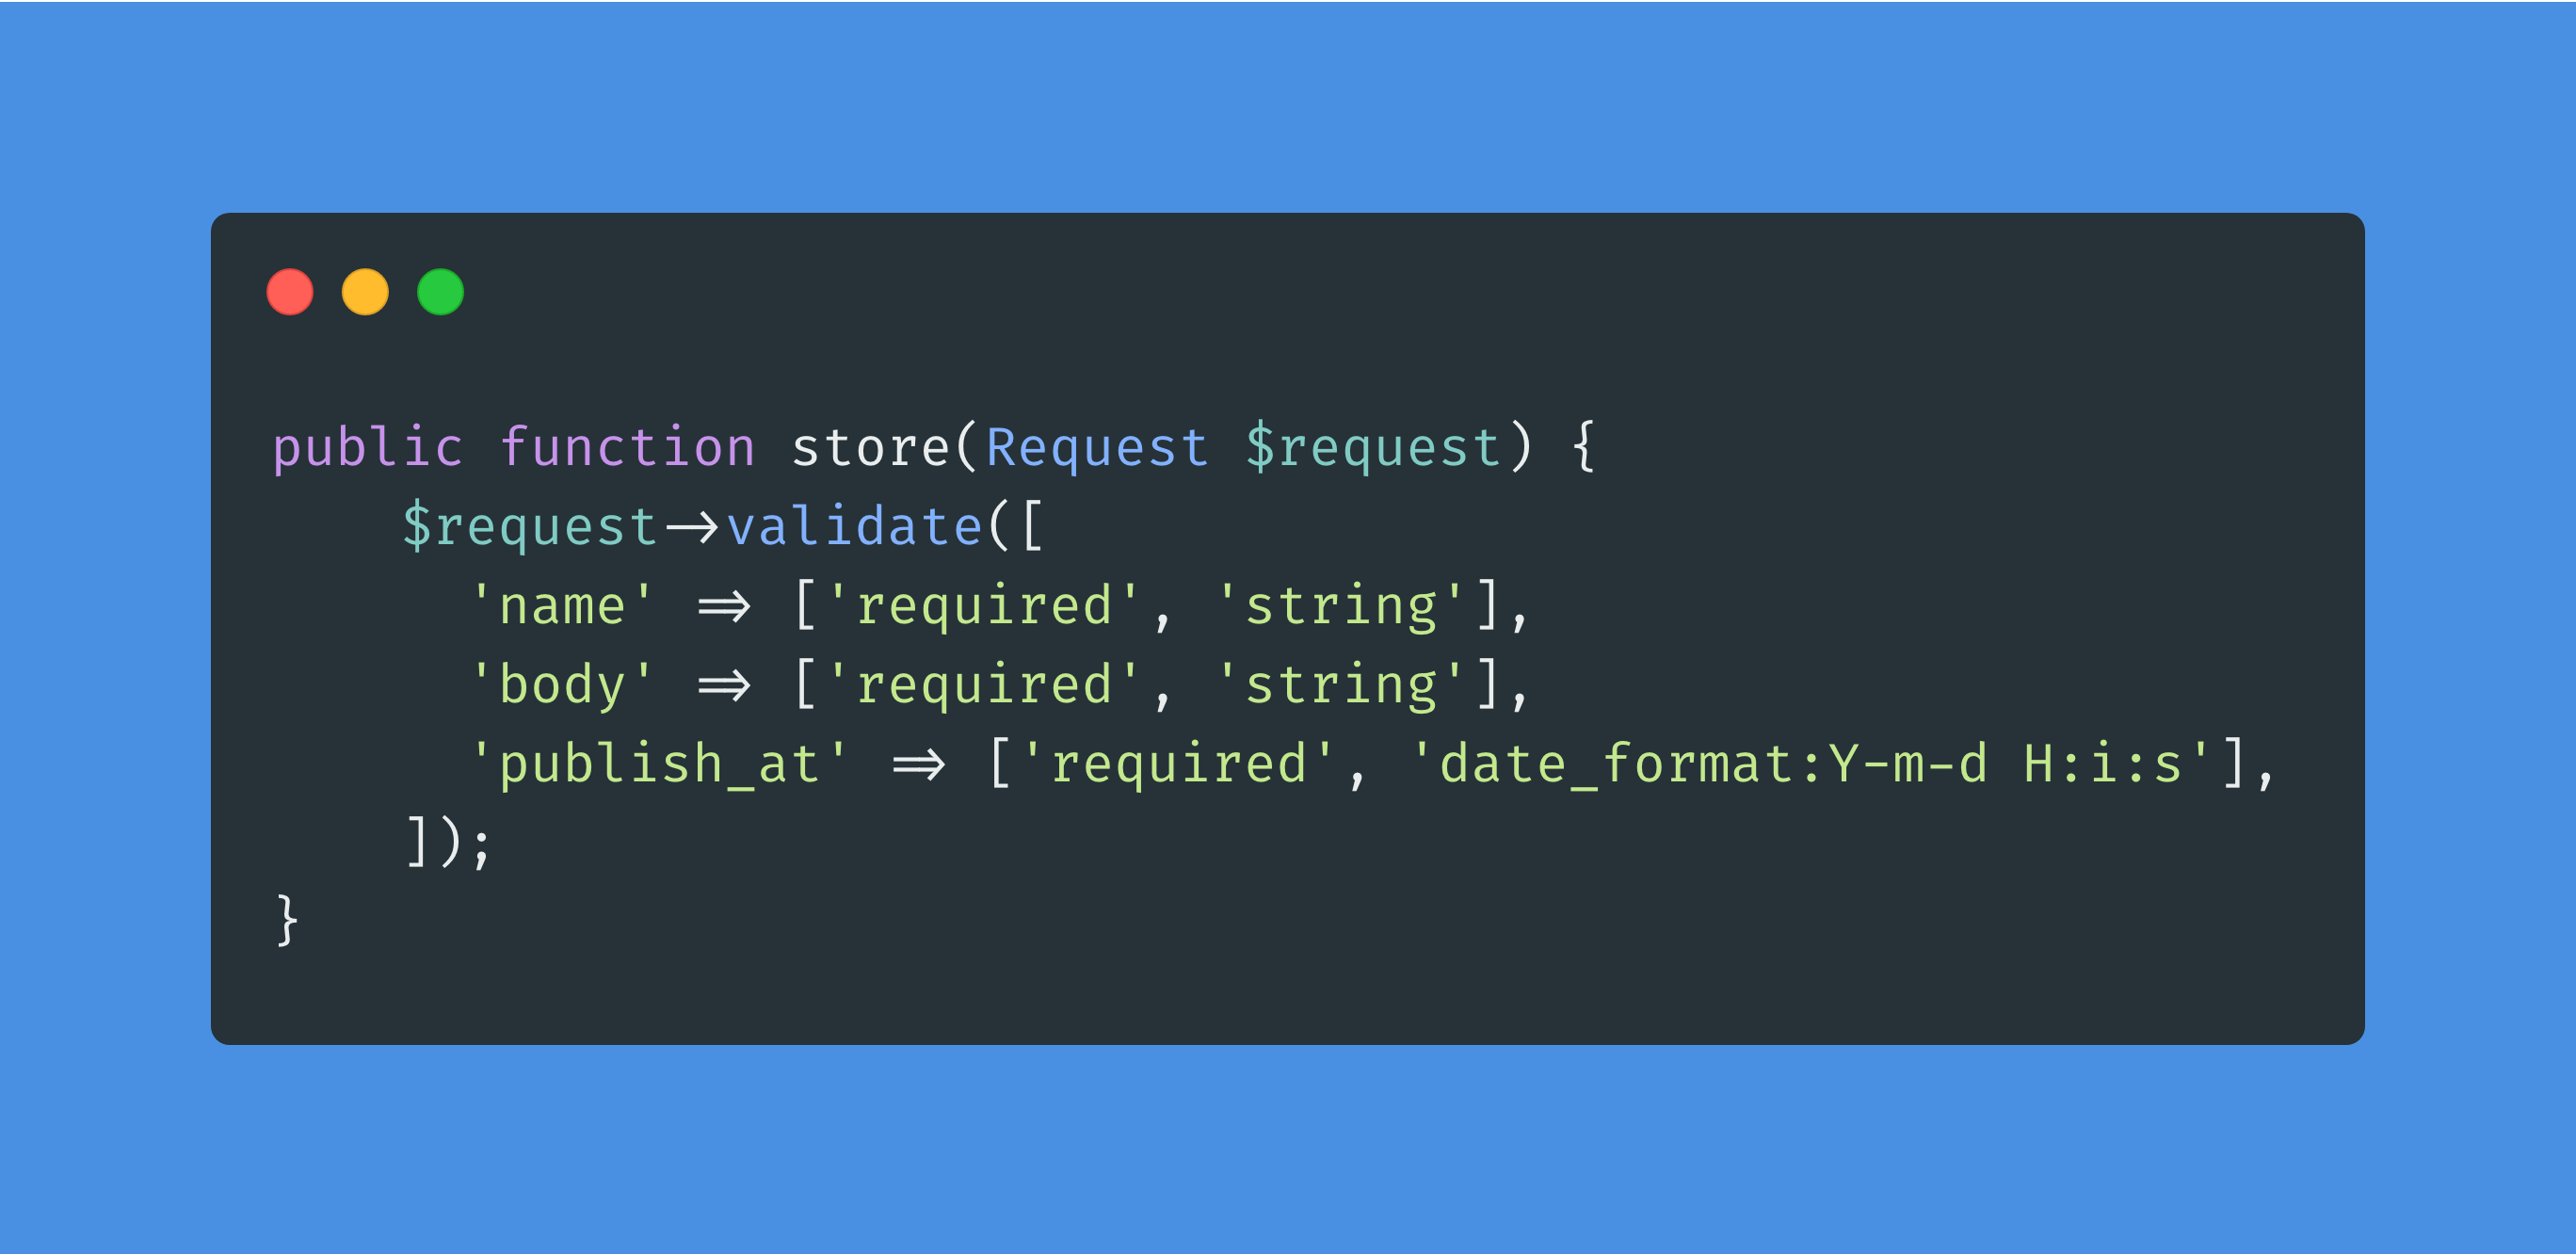
- Validate our file request.
- Add validation error text to the page if fired.
- Store the file onto the model using the Spatie library.
1. Installing Spatie Media Library
Installing this package is as easy as any other, just require the package with composer:
1composer require "spatie/laravel-medialibrary:^9.0.0"Then follow the instruction on setting up your model.
2. Adding a media collection to our model
For this example, we are uploading a single photo and we will call the collection 'image':
1namespace App\Models; 2 3use Illuminate\Database\Eloquent\Model; 4use Spatie\MediaLibrary\HasMedia; 5use Spatie\MediaLibrary\InteractsWithMedia; 6 7class Post extends Model implements HasMedia 8{ 9 use InteractsWithMedia;10 11 /**12 * Register the media collections13 */14 public function registerMediaCollections(): void15 {16 $this->addMediaCollection('image')17 ->singleFile()18 ->acceptsMimeTypes(['image/jpg', 'image/jpeg', 'image/png', 'image/gif']);19 }20}Note: You do not have to specify the acceptsMimeTypes array on the collection, as we will also validate that with Laravel, but I like to do it as a backup.
3. Validate the file request
In our uploadProfile method, we need to do some validation on the file to make sure it exists and is an image:
1public function updateProfile(): void2{3 $this->validate([4 'image' => ['required', 'image', 'max:10000'],5 ]);6 7 // File is an image that is < 10mb8}4. Add validation error text to the page
Underneath the file input we are going to check for errors and show the message if need be:
1<!-- views/livewire/forms/update-profile.blade.php --> 2 3<div> 4 <form wire:submit.prevent="updateProfile"> 5 <x-forms.filepond 6 wire:model="image" 7 /> 8 9 @error('image')10 <p class="mt-2 text-sm text-red-600">{{ $message }}</p>11 @enderror12 13 <button type="submit">Save</button>14 </form>15</div>
Note: We could put the error check inside the Blade component, but sometimes I like the added flexibility of showing errors in different places depending on the context of what i'm building.
5. Store the file onto the model using the Spatie library
1public function updateProfile(): void 2{ 3 // Validation Here 4 5 // We have no other fields, but we still need a post object to work with 6 $post = Post::create([]); 7 8 // Add the file to the collection 9 $post->addMedia($this->image->getRealPath())->toMediaCollection('image');10 11 // Redirect or send back success message12}As you can see we created an empty Post object, since we have no other fields to save. Then we get the path of the temporary image and save it to the image media collection.
Note: Since we specified singleFile on the media collection, if we were to save another image to this collection it would replace the current one.
That's it! You now have a fully working Filepond component run by Livewire, Alpine, and Spatie Media Library.
Uploading Multiple Files
Livewire and Filepond make uploading multiple files at a time really simple.
We need to modify the following:
- Rename our $image property to $images and make it an array.
- Add support for the allowMultiple property on our Blade component and pass the value to Filepond.
- Remove the singleFile attribute from our media collection.
- Modify the Livewire components updateProfile method to handle multiple images.
1. Add an images array
1<?php 2 3... 4 5class UpdateProfile extends Component 6{ 7 use WithFileUploads; 8 9 public $images = [];10 11 ...12}2. Add support for the allowMultiple property on Filepond
1<!-- views/livewire/forms/update-profile.blade.php --> 2 3<div 4 wire:ignore 5 x-data 6 x-init="() => { 7 const post = FilePond.create($refs.input); 8 post.setOptions({ 9 allowMultiple: {{ $attributes->has('multiple') ? 'true' : 'false' }},10 server: {11 ...12 }13 });14 }"15>16 <input type="file" x-ref="input" />17</div>By default, multiple will be off, but we turn it on at the component level on a per use basis:
1<!-- views/livewire/forms/update-profile.blade.php -->2 3<x-forms.filepond4 wire:model="images"5 multiple6/>3. Remove the singleFile property from our media collection:
1public function registerMediaCollections(): void2{3 $this->addMediaCollection('images')4 // ->singleFile()5 ->acceptsMimeTypes(['image/jpg', 'image/jpeg', 'image/png', 'image/gif']);6}4. Modify updateProfile to handle multiple images
1public function updateProfile(): void 2{ 3 // Validation Here 4 5 // We have no other fields, but we still need a post object to work with 6 $post = Post::create([]); 7 8 // Add the files to the collection 9 collect($this->images)->each(fn($image) =>10 $post->addMedia($image->getRealPath())->toMediaCollection('images')11 );12 13 // Redirect or send back success message14}
Adding Plugins
Adding plugins is as easy as including the plugin via CDN, and passing the options from the parent to the Blade component:
Here is one example, but you will find multiple in the completed implementation below.
The steps you need to take to add a plugin are:
- Get the plugins CDN links and add them to the stacks in the component.
- Add support for the selected components options in the Javascript
- Pass the options into the component if needed, or if not make sure there are sensible defaults.
First we need to find a plugin to use.
For this example I am going to install the image preview plugin, but the other plugins follow the same flow.
1. Add the plugin CDN
1... 2 3@push('styles') 4 @once 5 <link href="https://unpkg.com/filepond/dist/filepond.css" rel="stylesheet"> 6 <link href="https://unpkg.com/filepond-plugin-image-preview/dist/filepond-plugin-image-preview.css" rel="stylesheet"> 7 @endonce 8@endpush 9 10@push('scripts')11 @once12 <script src="https://unpkg.com/filepond-plugin-image-preview/dist/filepond-plugin-image-preview.js"></script>13 <script src="https://unpkg.com/filepond/dist/filepond.js"></script>14 <script>15 FilePond.registerPlugin(FilePondPluginImagePreview);16 </script>17 @endonce18@endpush2. Add support for the plugin in the Javascript
1<div 2 wire:ignore 3 x-data 4 x-init=" 5 () => { 6 const post = FilePond.create($refs.{{ $attributes->get('ref') ?? 'input' }}); 7 post.setOptions({ 8 ... 9 10 allowImagePreview: {{ $attributes->has('allowFileTypeValidation') ? 'true' : 'false' }},11 imagePreviewMaxHeight: {{ $attributes->has('imagePreviewMaxHeight') ? $attributes->get('imagePreviewMaxHeight') : '256' }},12 });13 }14 "15>16 <input type="file" x-ref="{{ $attributes->get('ref') ?? 'input' }}" />17</div>18 19...In the above we have added a flag called allowImagePreview to enable the plugin if it exists on the component. We then can pass in imagePreviewMaxHeight to the component, or if we leave it out it will use the default height of 256.
3. Pass the options into the component:
1<x-input.filepond2 wire:model="image"3 allowImagePreview4 imagePreviewMaxHeight="200"5/>These are the minimum steps needed to add a plugin, different plugins have different amount of options that may require different implementation.
You may also want to do some modifications to ensure that plugin CDN links are not loaded unless the plugin is actually being used, but that is outside the scope of this tutorial.
Completed Implementation
Filepond Component:
1<div 2 wire:ignore 3 x-data 4 x-init=" 5 () => { 6 const post = FilePond.create($refs.{{ $attributes->get('ref') ?? 'input' }}); 7 post.setOptions({ 8 allowMultiple: {{ $attributes->has('multiple') ? 'true' : 'false' }}, 9 server: {10 process:(fieldName, file, metadata, load, error, progress, abort, transfer, options) => {11 @this.upload('{{ $attributes->whereStartsWith('wire:model')->first() }}', file, load, error, progress)12 },13 revert: (filename, load) => {14 @this.removeUpload('{{ $attributes->whereStartsWith('wire:model')->first() }}', filename, load)15 },16 },17 allowImagePreview: {{ $attributes->has('allowFileTypeValidation') ? 'true' : 'false' }},18 imagePreviewMaxHeight: {{ $attributes->has('imagePreviewMaxHeight') ? $attributes->get('imagePreviewMaxHeight') : '256' }},19 allowFileTypeValidation: {{ $attributes->has('allowFileTypeValidation') ? 'true' : 'false' }},20 acceptedFileTypes: {!! $attributes->get('acceptedFileTypes') ?? 'null' !!},21 allowFileSizeValidation: {{ $attributes->has('allowFileSizeValidation') ? 'true' : 'false' }},22 maxFileSize: {!! $attributes->has('maxFileSize') ? "'".$attributes->get('maxFileSize')."'" : 'null' !!}23 });24 }25 "26>27 <input type="file" x-ref="{{ $attributes->get('ref') ?? 'input' }}" />28</div>29 30@push('styles')31 @once32 <link href="https://unpkg.com/filepond/dist/filepond.css" rel="stylesheet">33 <link href="https://unpkg.com/filepond-plugin-image-preview/dist/filepond-plugin-image-preview.css" rel="stylesheet">34 @endonce35@endpush36 37@push('scripts')38 @once39 <script src="https://unpkg.com/filepond-plugin-file-validate-type/dist/filepond-plugin-file-validate-type.js"></script>40 <script src="https://unpkg.com/filepond-plugin-file-validate-size/dist/filepond-plugin-file-validate-size.js"></script>41 <script src="https://unpkg.com/filepond-plugin-image-preview/dist/filepond-plugin-image-preview.js"></script>42 <script src="https://unpkg.com/filepond/dist/filepond.js"></script>43 <script>44 FilePond.registerPlugin(FilePondPluginFileValidateType);45 FilePond.registerPlugin(FilePondPluginFileValidateSize);46 FilePond.registerPlugin(FilePondPluginImagePreview);47 </script>48 @endonce49@endpushUsing the component with all options:
1<x-input.filepond 2 wire:model="images" 3 multiple 4 allowImagePreview 5 imagePreviewMaxHeight="200" 6 allowFileTypeValidation 7 acceptedFileTypes="['image/png', 'image/jpg']" 8 allowFileSizeValidation 9 maxFileSize="4mb"10/>The rest of the implementation such as the Livewire component, validation, storing the files, etc. are up to your preference, but you can use the above code as a base.

I hope you enjoyed this relatively in-depth tutorial on how all of these technologies can work together. If you did, feel free to like this post and share on social media and check back weekly for new original articles.
Also need Image Editing?
Doka.js is what you're looking for. It's a Modern JavaScript Image Editor, Doka supports setting crop aspect ratios, resizing, rotating, cropping, and flipping images. Above all, it integrates beautifully with FilePond.